Verification Results: How to Work with Verified Email Lists
Step 1
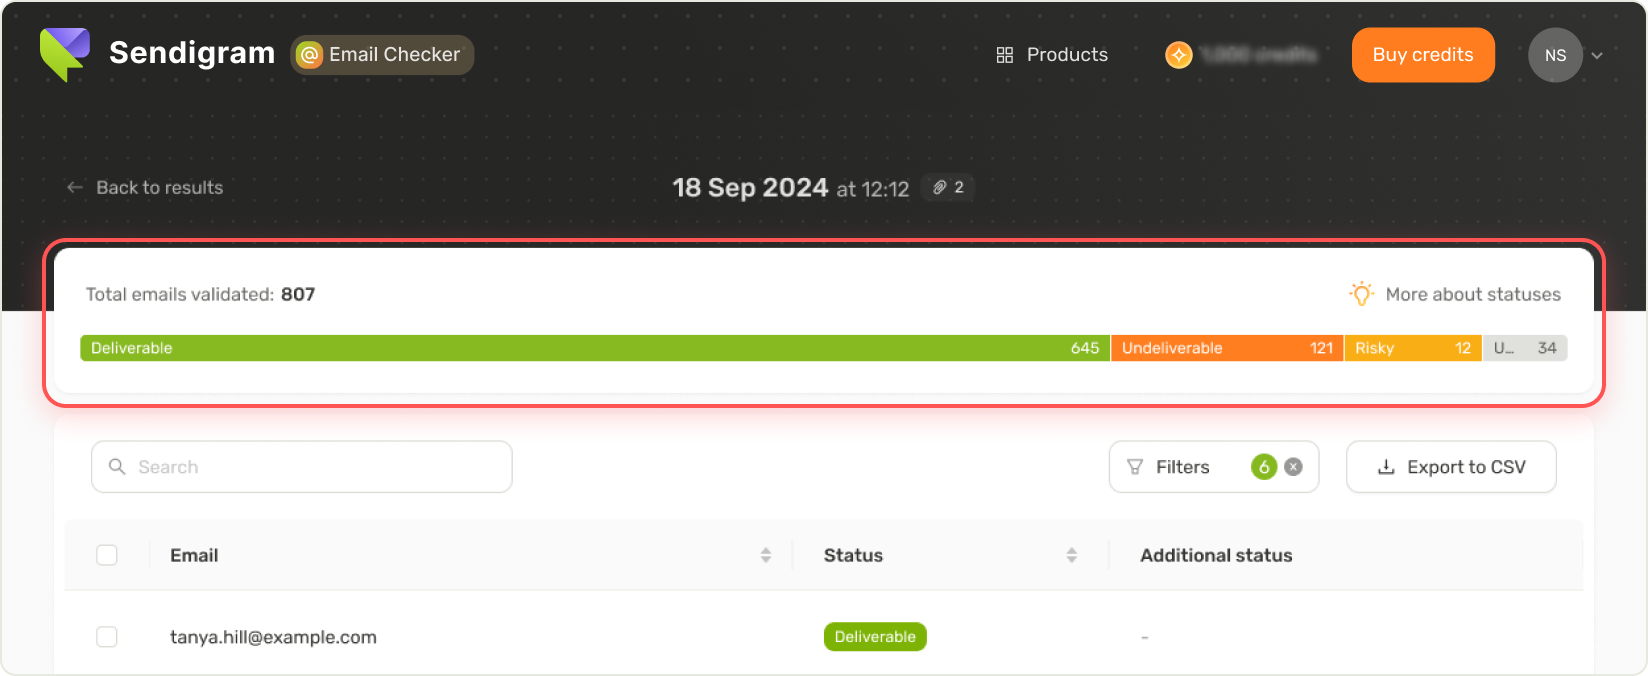
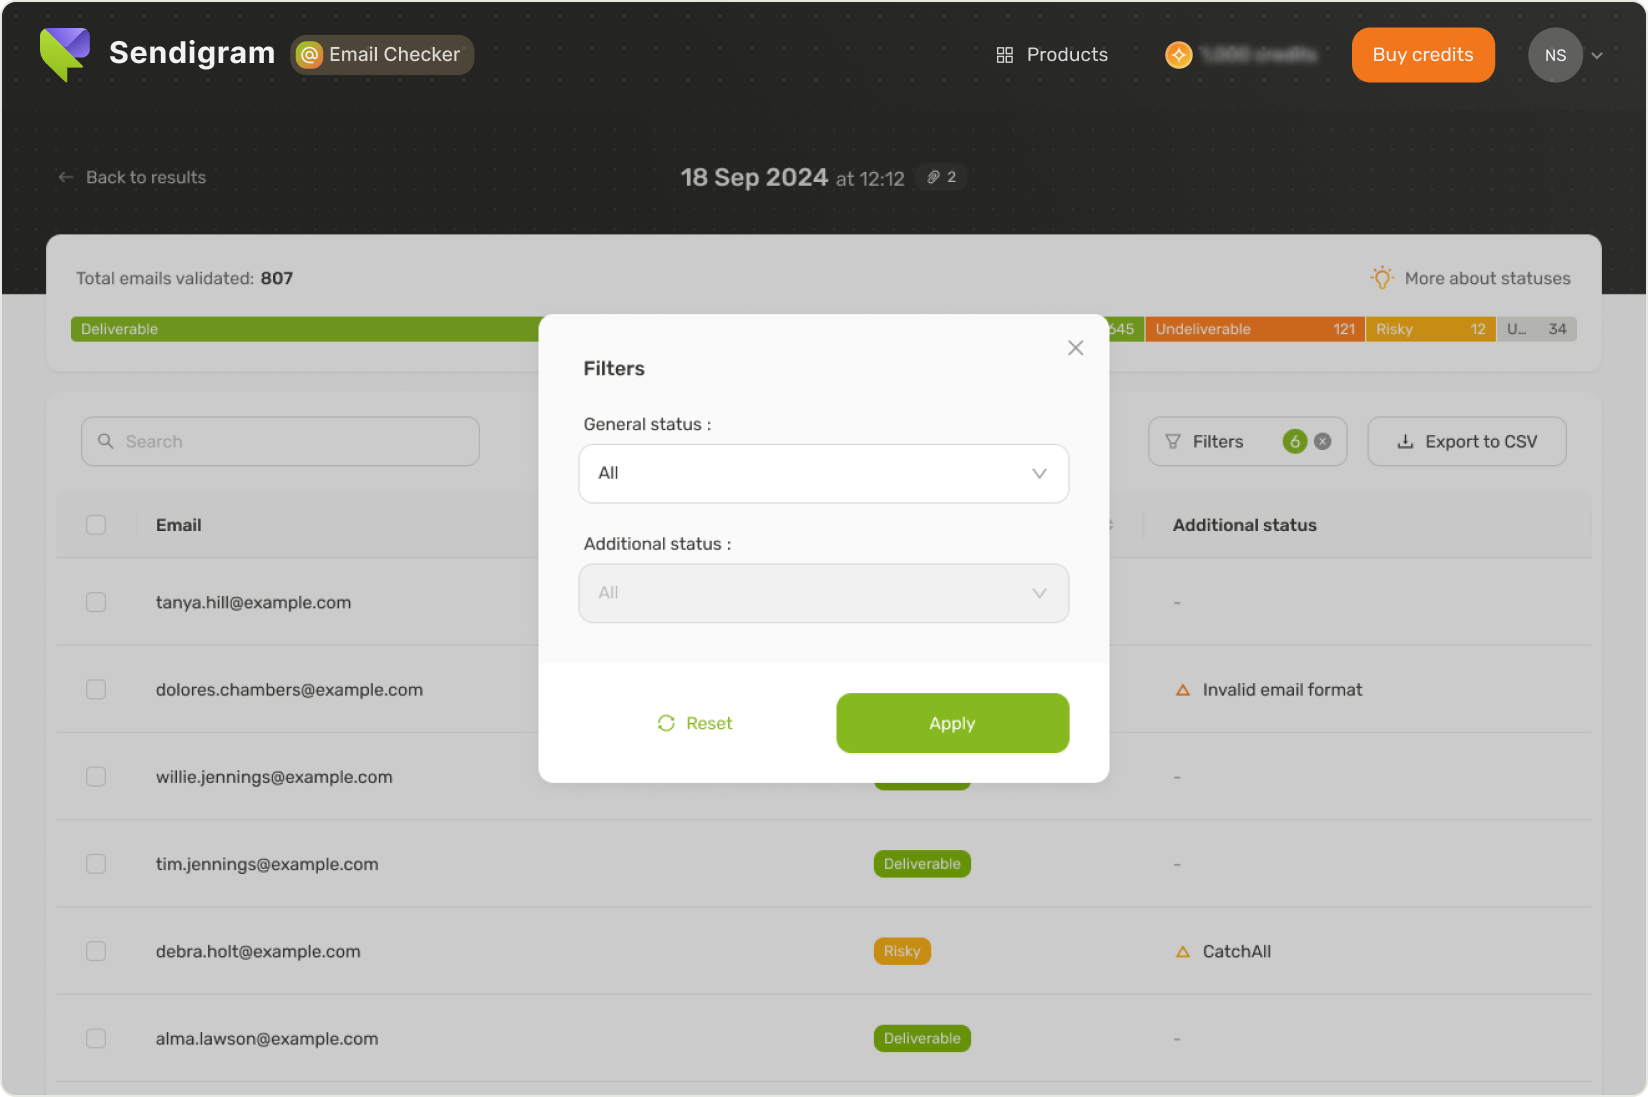
After verification completes, you can click on the list to open a detailed report with verification results.
Step 2
At the top, see the statistics on the email statuses assigned to the addresses on your list.
Step 3
You can also review your entire list of verified email addresses, and see the status of each address opposite it, along with a description listed as “additional status”.
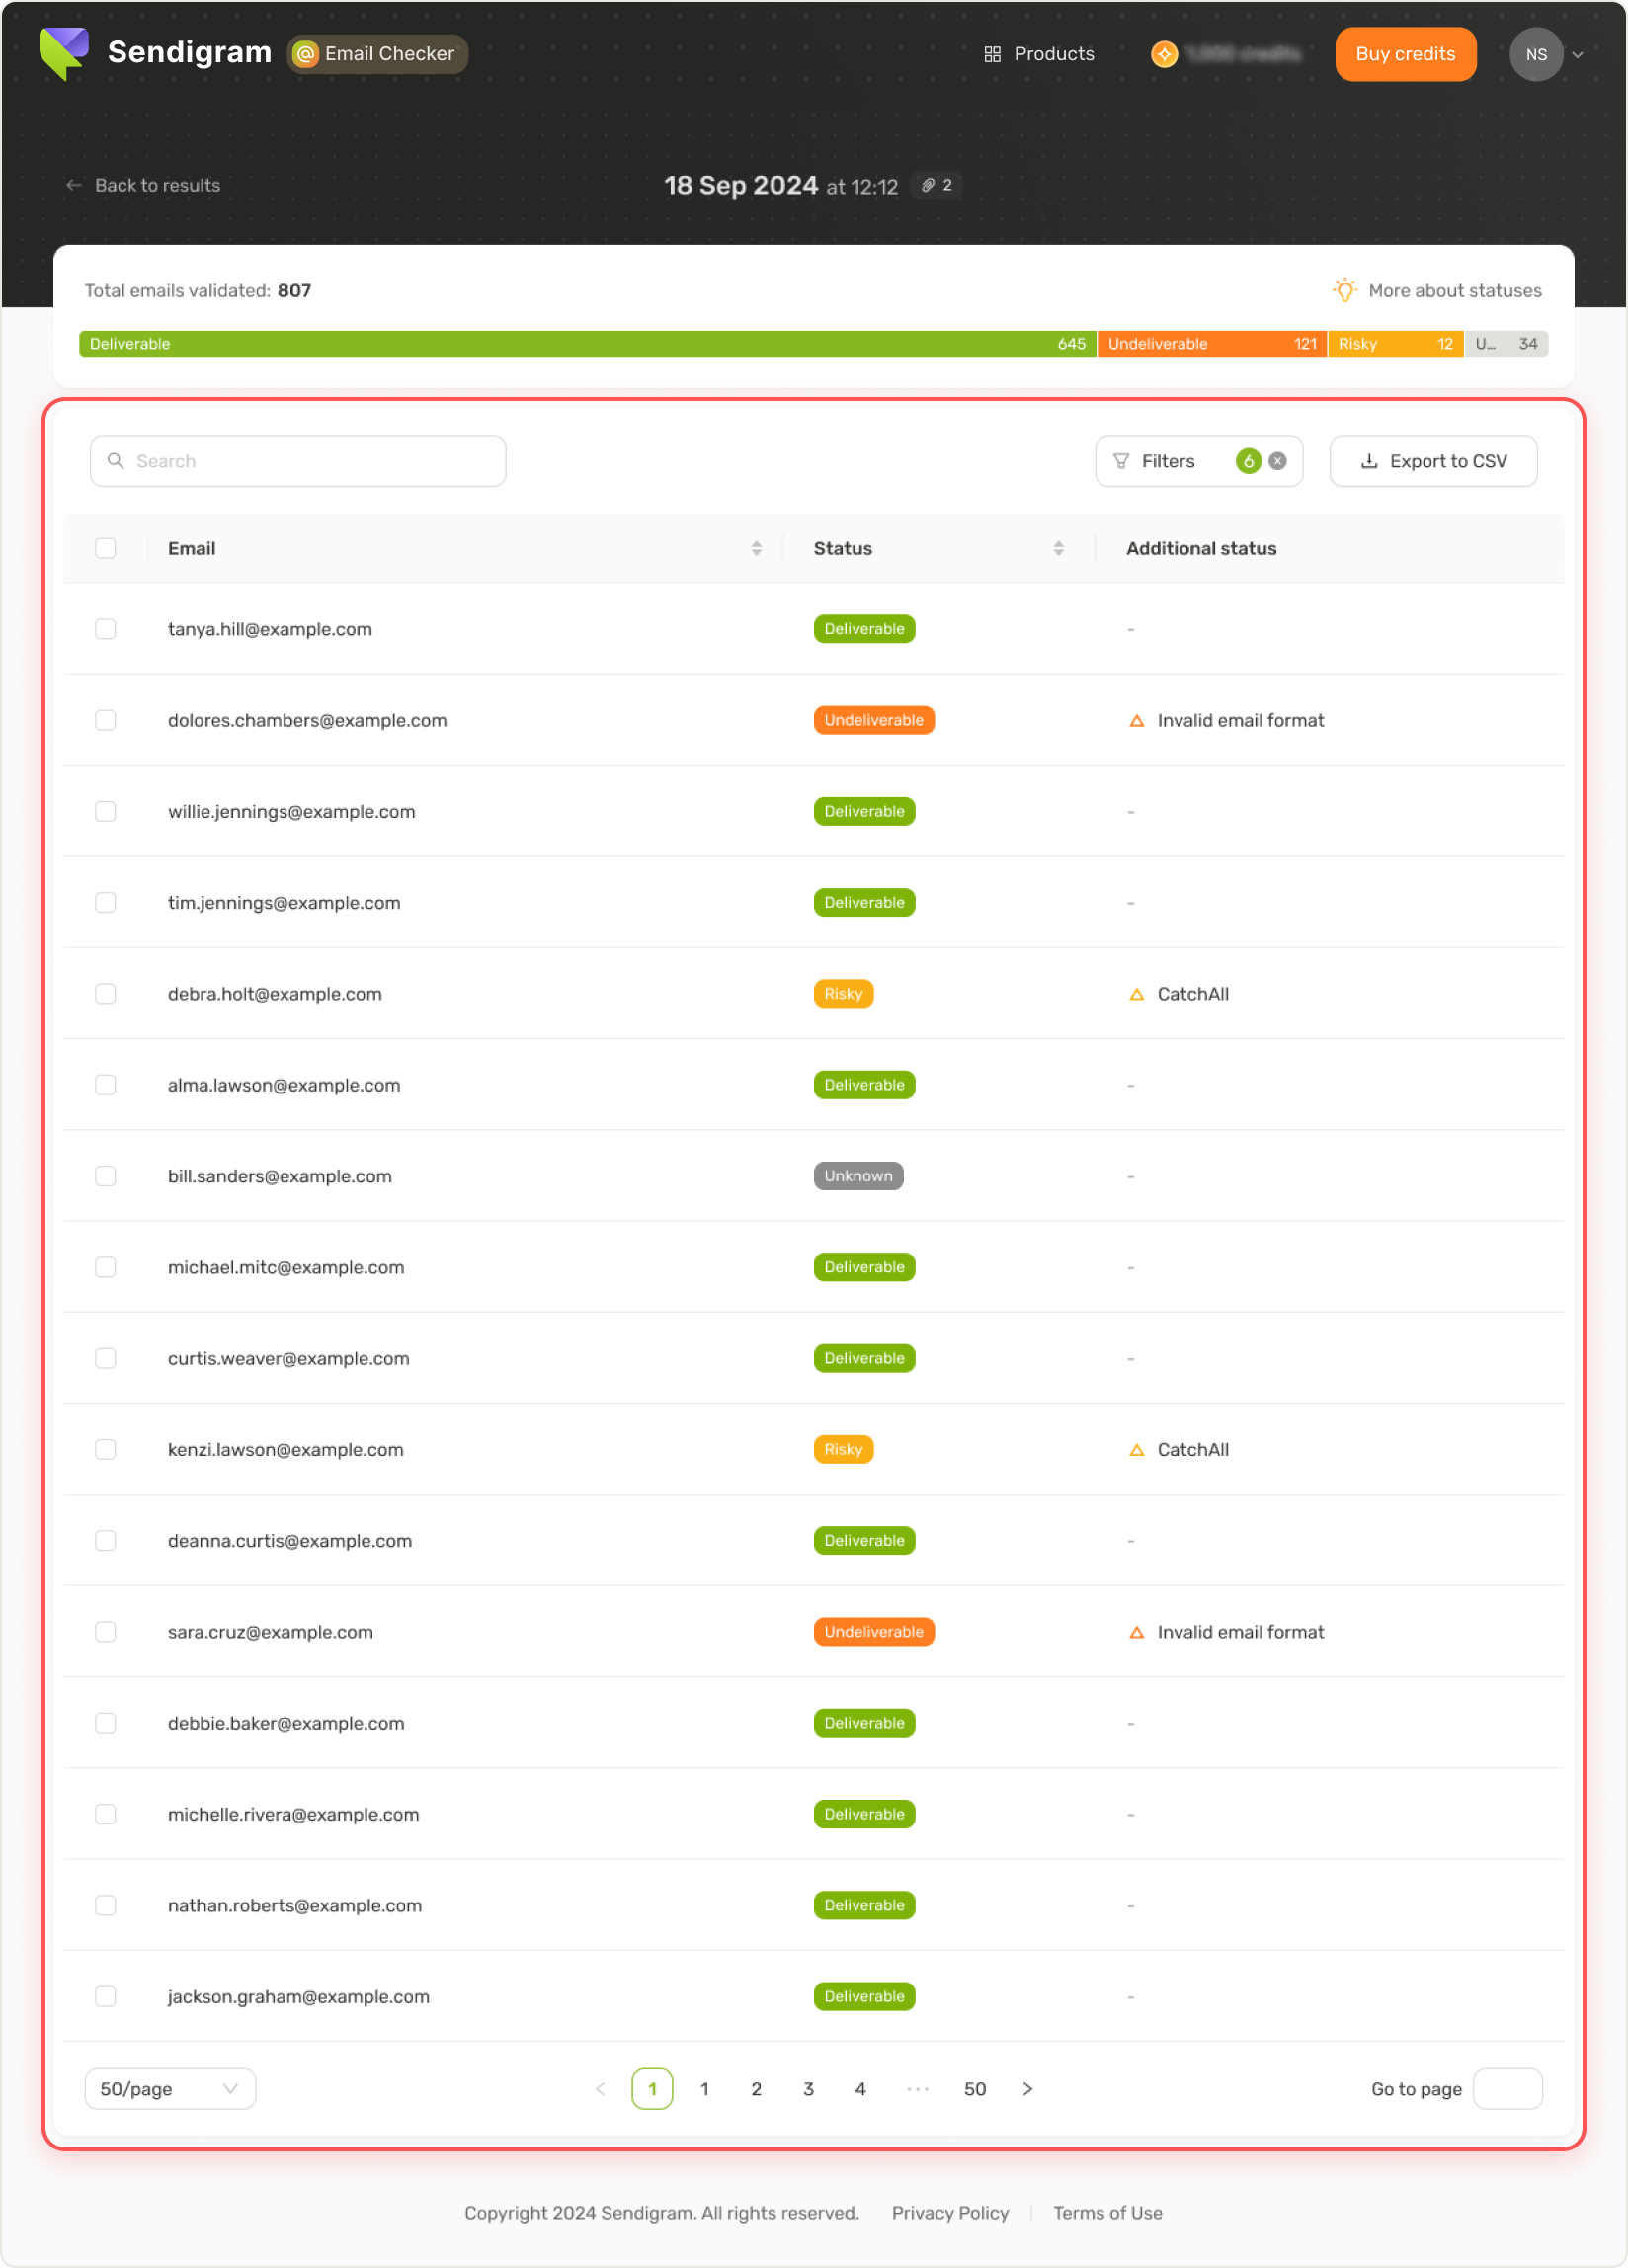
If you’d like, you can use filters to generate a list of addresses that have a specific status, additional status.
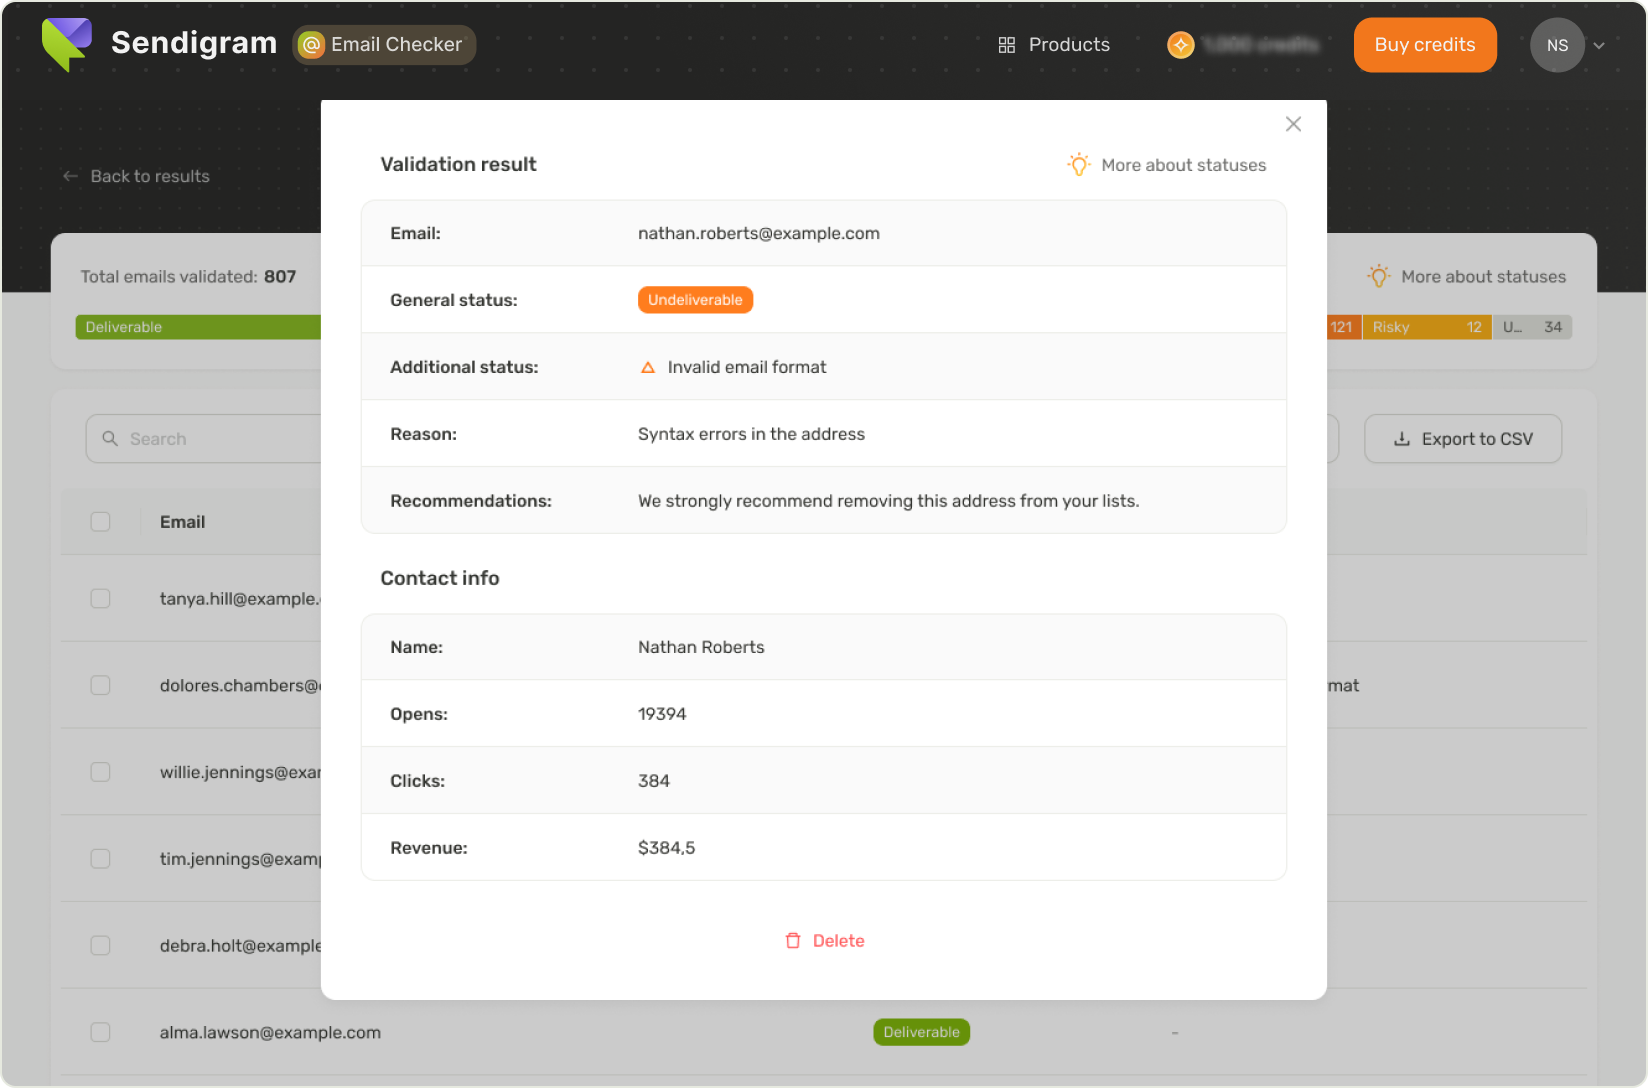
Step 4
Click on an email address to view a detailed card for it. In addition to the main verification results, the card may provide the contact data you had originally included on your list (clicks, opens, revenue, etc.), or recommendations on how to correct a potentially misspelled address.