
- Home
- Fundamentals of Email Marketing
- How Do You Set Up Email DNS Re ...




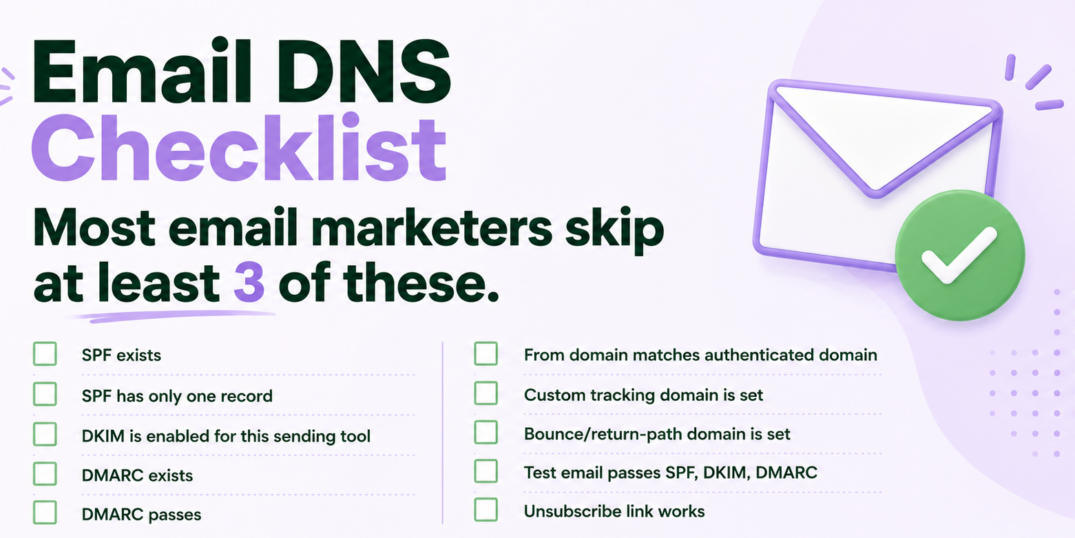
To set up email DNS correctly, identify every service that sends mail for your domain, choose a sending domain or subdomain, configure SPF and DKIM, publish a DMARC policy, confirm domain alignment, set up any custom tracking and return-path domains, and test the final authentication results.
Email DNS setup is not the most exciting part of email marketing. Nobody has ever said, “That TXT record really completes the campaign.”
But the records behind your emails help mailbox providers answer three important questions:
- Is this platform allowed to send for this domain?
- Has the message been altered since it was signed?
- Does the authenticated domain match the address the recipient can see?
If those answers are unclear, even wanted email can look suspicious.
This checklist walks through the setup in a practical order. Your email service provider will supply the exact values you need, so do not copy the example records in this article into your DNS.
What email DNS records do you need?
The three core email-authentication methods are:
- SPF: Identifies which systems are authorized to send using a domain in the message’s return path.
- DKIM: Adds a cryptographic signature that receiving servers can verify using a public key in DNS.
- DMARC: Checks whether SPF or DKIM passes with a domain aligned to the visible From address, then tells receivers how to handle failures and where to send reports.
You may also need DNS records for a custom tracking domain and a bounce or return-path domain. These are usually created as CNAME records supplied by your email platform.
Email DNS setup checklist
1. List every tool that sends email for your domain
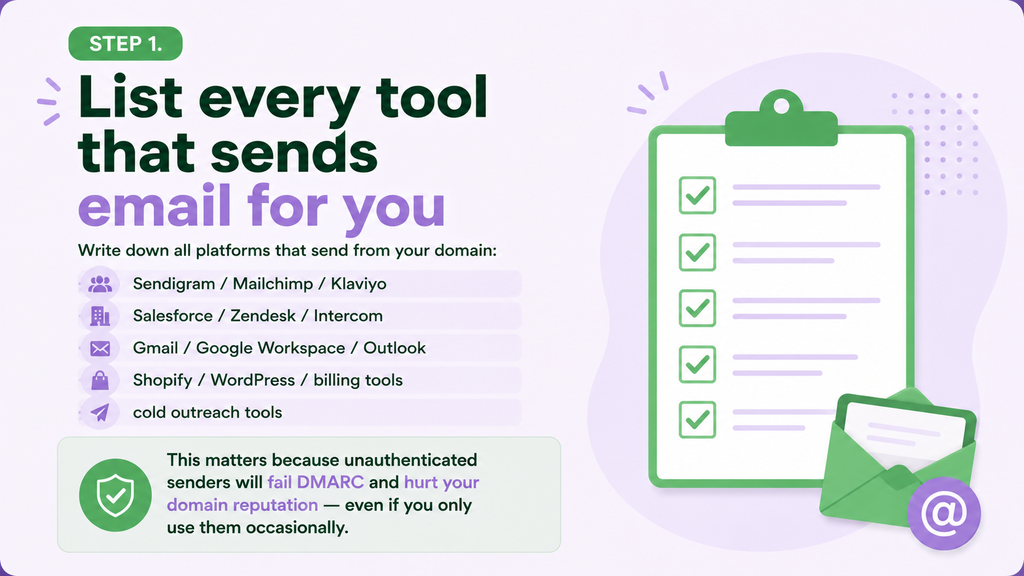
Start with an inventory before changing any DNS record.
Write down every platform that sends mail using your domain, including:
- Your email marketing platform
- Google Workspace, Microsoft 365, or another business inbox provider
- CRM and sales tools
- Customer-support platforms
- E-commerce platforms
- Website and form plugins
- Billing and invoicing systems
- Booking tools
- Transactional email services
- Older tools that may still be connected
This step matters because SPF, DKIM, and DMARC must account for all legitimate senders. If you publish a strict policy while a forgotten system is still sending unauthenticated mail, that system’s messages may fail authentication.
Do not assume a tool sends from its own domain simply because you log in to its website. Check the From address, return path, and authentication results of actual messages.
2. Choose a dedicated sending domain or subdomain
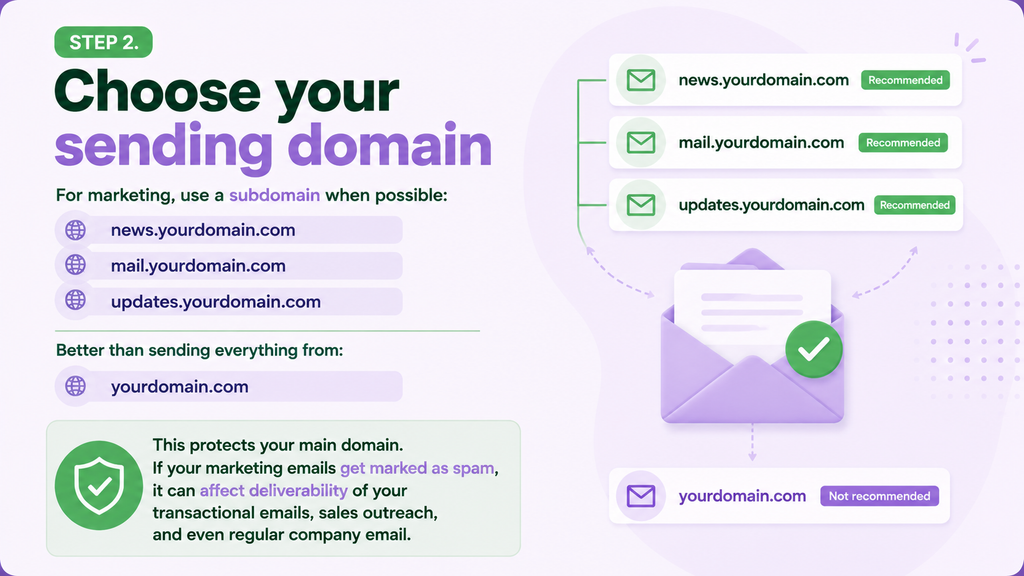
For marketing email, a subdomain is often a sensible choice. Examples include:
news.yourdomain.commail.yourdomain.comupdates.yourdomain.com
Your visible From address could then be something like newsletter@news.yourdomain.com.
A subdomain helps organize email streams and gives mailbox providers clearer signals about what kind of mail is being sent. It can also reduce the direct impact that a problem with one stream has on another.
However, a subdomain is not a magic wall. Mailbox providers can still connect the reputation of a subdomain with its organizational domain. Good consent, engagement, list hygiene, and sending practices still matter.
Use clear subdomains for different purposes when the volume justifies it. For example, one for marketing and another for transactional messages. Avoid creating a maze of subdomains that nobody remembers how to manage.
3. Publish one complete SPF record
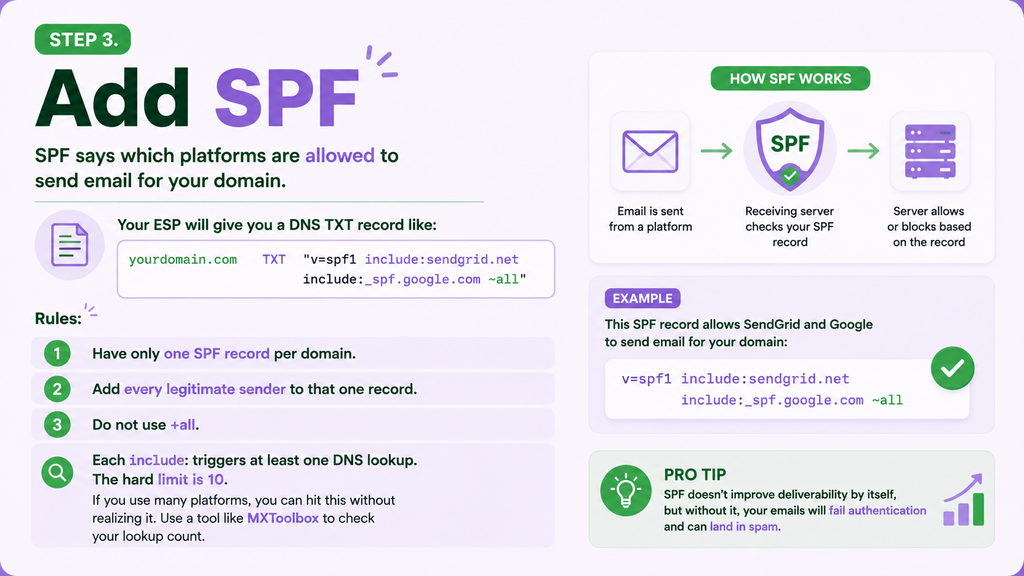
SPF tells receiving systems which servers are authorized to send using your envelope sender or return-path domain.
Your email provider will normally give you a TXT value similar to this:
v=spf1 include:example-email-platform.com include:_spf.google.com ~allThe exact value will depend on your senders.
Follow these rules:
- Publish only one SPF record for each domain or subdomain.
- Add every legitimate sender to that one record.
- Remove services you no longer use.
- Do not copy SPF values from another company or an old tutorial.
- Do not automatically use
-allunless you understand the effect and have confirmed every authorized sender.
SPF evaluation is also limited to ten DNS-querying mechanisms. Long chains of include, a, mx, redirect, or exists mechanisms can exceed that limit and return a permanent error.
SPF passing does not guarantee inbox placement. It proves authorization for one part of the message; reputation and other authentication checks still apply.
4. Enable DKIM for every sending platform
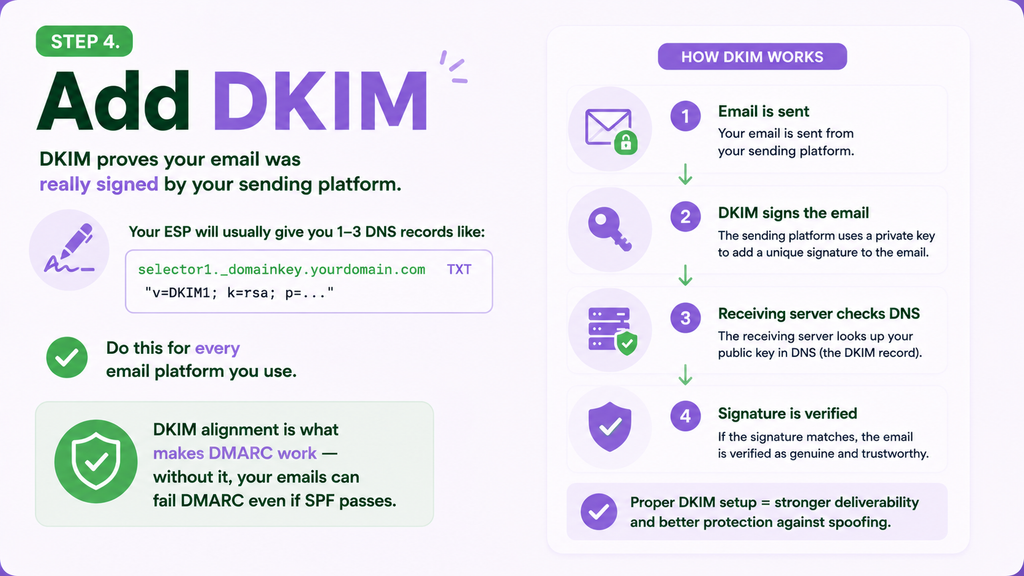
DKIM attaches a cryptographic signature to the message. The receiving server retrieves the public key from DNS and checks whether the signature is valid.
Your provider will usually supply one or more records containing:
- A selector, which identifies the key
- A DNS hostname, such as
selector1._domainkey.yourdomain.com - A TXT or CNAME value
You may see a TXT value beginning with:
v=DKIM1; k=rsa; p=...Some services use CNAME records instead, allowing them to manage and rotate the keys.
Publish the exact records provided by each sending platform, then activate or verify DKIM inside that platform. Adding a record to DNS does not always switch signing on automatically.
It is normal to have multiple DKIM selectors. Different tools can use different selectors without conflicting with one another.
5. Add DMARC and begin with monitoring
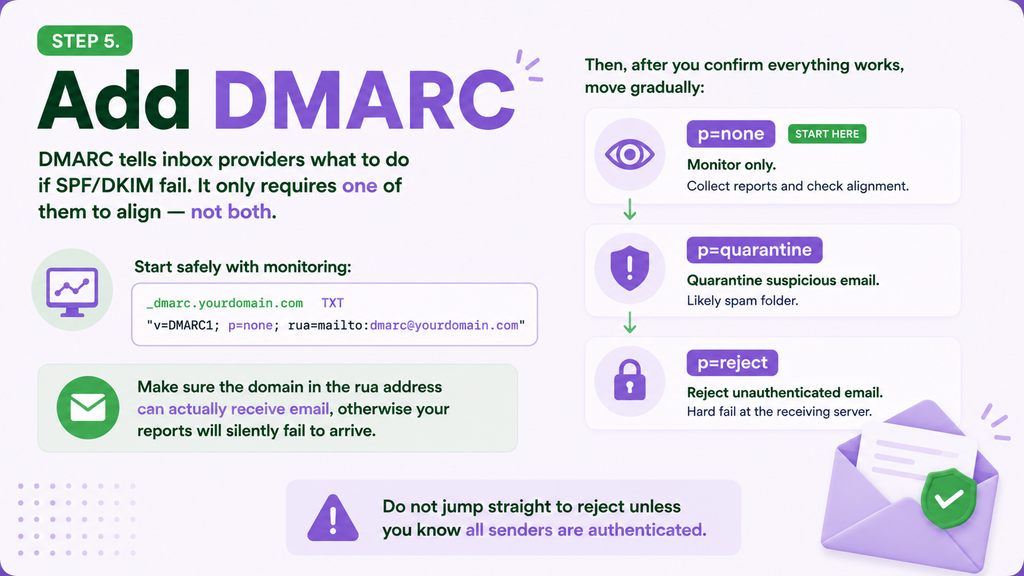
DMARC connects authentication to the domain recipients see in the From address.
It checks whether at least one of these conditions is met:
- SPF passes and the SPF-authenticated domain aligns with the visible From domain.
- DKIM passes and the DKIM signing domain aligns with the visible From domain.
A cautious starting record may look like this:
v=DMARC1; p=none; rua=mailto:dmarc@yourdomain.comWith p=none, receivers can send aggregate reports without being asked to quarantine or reject failing messages. This lets you discover legitimate senders, configuration mistakes, and possible domain impersonation.
Make sure the address in the rua tag can receive and process reports. DMARC aggregate reports are machine-readable XML files, so many organizations use a reporting service rather than reviewing them manually.
After confirming that legitimate mail authenticates and aligns correctly, you can move gradually to:
p=quarantine, which asks participating receivers to treat failing messages as suspiciousp=reject, which asks them to reject messages that fail DMARC
Do not jump directly to p=reject until you know all legitimate sending sources are covered.
6. Confirm SPF or DKIM alignment
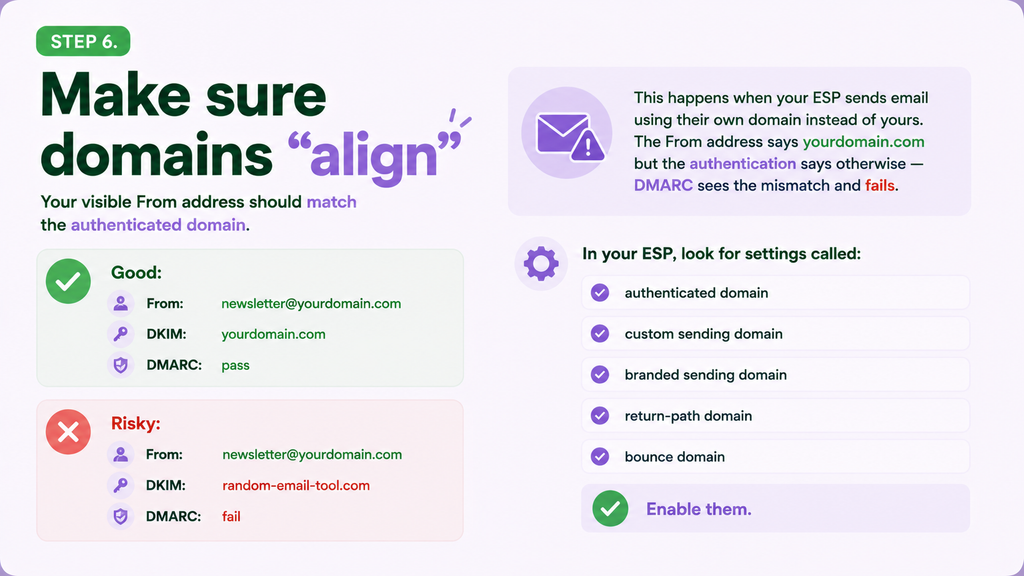
Authentication and alignment are related, but they are not the same thing.
An email can pass SPF or DKIM using a platform’s domain while failing DMARC because that domain does not align with the one shown in the visible From address.
For example:
From: newsletter@yourdomain.com
DKIM signing domain: yourdomain.com
Result: aligned
But this may fail alignment:
From: newsletter@yourdomain.com
DKIM signing domain: random-email-tool.com
Result: not aligned
DMARC needs only one aligned authentication method to pass: aligned SPF or aligned DKIM. Bulk senders to personal Gmail accounts are expected to use both SPF and DKIM, but only one needs to align for DMARC.
Inside your email platform, look for settings such as:
- Authenticate domain
- Custom sending domain
- Branded sending domain
- Return-path domain
- Bounce domain
These settings help replace platform-owned domains with domains related to your brand.
7. Set up a custom tracking domain
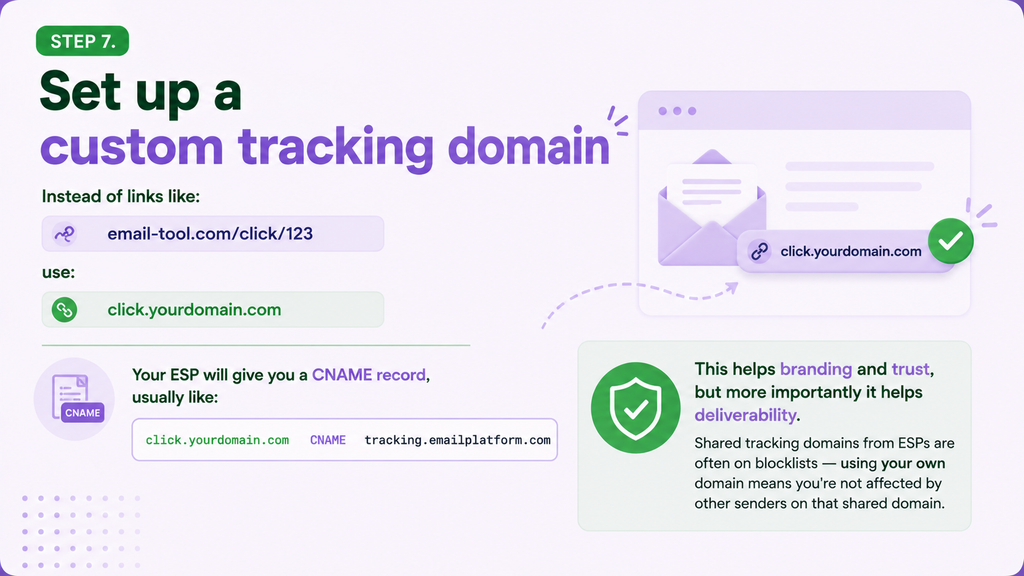
Email platforms rewrite links so they can measure clicks. Without a custom tracking domain, recipients may see a shared platform domain in the destination URL.
A custom tracking domain might look like:
click.yourdomain.comYour provider will normally ask you to publish a CNAME record pointing that subdomain to its tracking infrastructure.
A branded tracking domain can make links more consistent with the sender and reduces dependence on a shared tracking hostname used by unrelated senders. It can support trust and reputation management, but it is not a substitute for SPF, DKIM, DMARC, good consent, or relevant content.
After configuration, click a link in a real test email and confirm that tracking works and the destination loads securely over HTTPS.
8. Configure a custom bounce or return-path domain
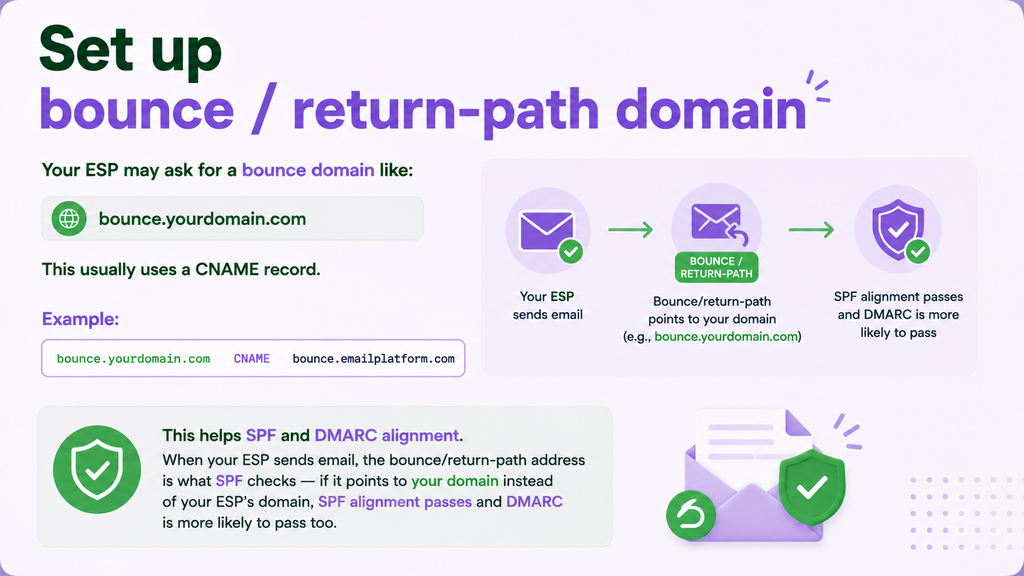
The return path receives bounce information when a message cannot be delivered. It is also the domain SPF evaluates.
Your platform may ask you to create a subdomain such as:
bounce.yourdomain.comThis often uses a CNAME record pointing to the provider’s infrastructure.
A custom return path can help SPF use a domain associated with your organization and may provide SPF alignment for DMARC. The provider still processes the bounces; the DNS record connects your branded subdomain to that service.
Use the exact hostname and value supplied by your platform. Do not invent a bounce record or point it at a normal inbox.
9. Verify the records inside your email platform
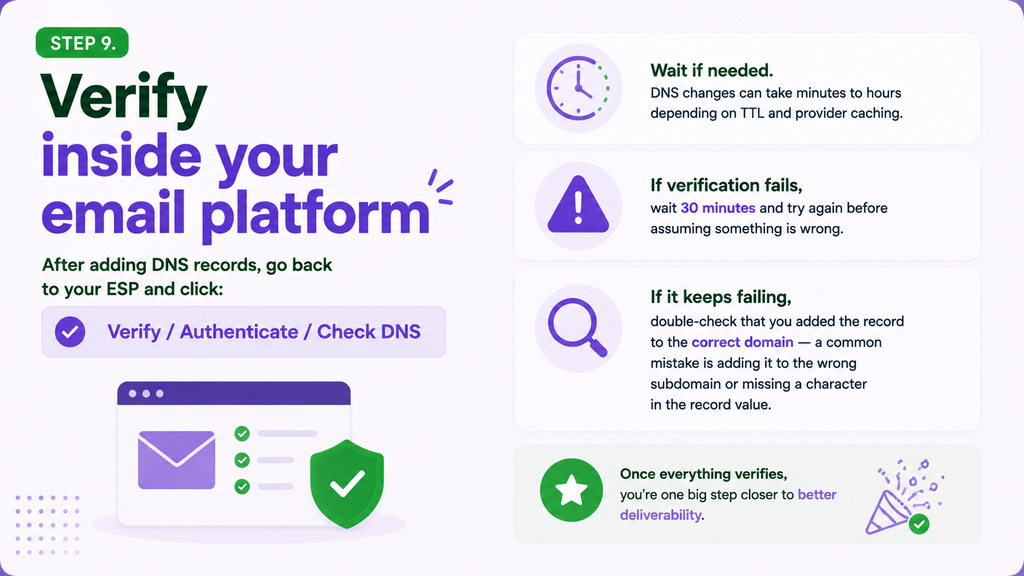
After publishing the records, return to the email platform and select its verification option. It may be labeled:
- Verify
- Authenticate
- Check DNS
- Validate domain
DNS changes can appear quickly, but some take several hours to propagate because of resolver caching and TTL settings.
If verification fails:
- Wait and try again later.
- Confirm that the record was added to the correct domain or subdomain.
- Check whether your DNS provider automatically appended the domain name.
- Look for an extra quotation mark, missing period, or copied space.
- Confirm that a CNAME is not conflicting with another record at the same hostname.
- Make sure you did not create a second SPF record.
Repeatedly deleting and recreating a correct record can restart the waiting period. Verify the values carefully before changing them again.
10. Send a test email and inspect the results
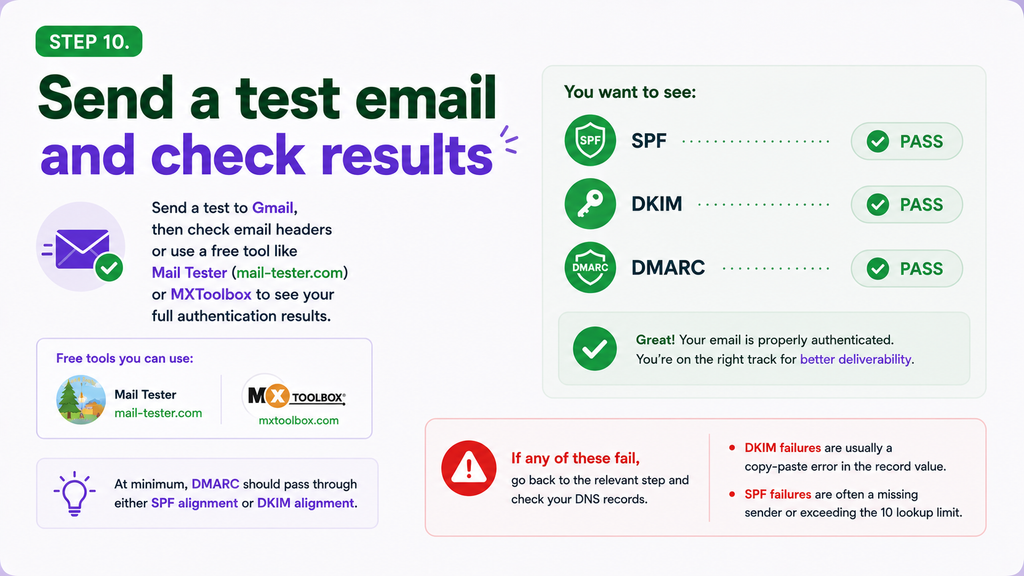
Platform verification is helpful, but the final test is a real message.
Send an email to an inbox you can inspect, such as Gmail. Open the message headers or use Show original and look for:
SPF: PASSDKIM: PASSDMARC: PASS
Check which domains passed—not only the word PASS. Confirm that SPF or DKIM aligns with the visible From domain.
You can also use an email-authentication testing service to review the message headers. Avoid entering private credentials into unfamiliar tools; a legitimate test normally gives you a temporary email address to which you send a message.
If SPF fails, check for missing senders, multiple SPF records, or too many DNS lookups. If DKIM fails, check the selector, record value, and whether signing was enabled. If DMARC fails while SPF and DKIM pass, alignment is the likely problem.
Common email DNS mistakes
The most common problems are not advanced. They are small setup errors:
- Publishing two separate SPF records
- Forgetting a website, CRM, support, or billing sender
- Adding the record to the root domain when the provider requested a subdomain
- Copying the hostname incorrectly because the DNS provider appends the domain automatically
- Publishing DKIM but forgetting to activate signing
- Assuming any SPF or DKIM pass automatically means DMARC will pass
- Moving DMARC to
p=rejectbefore reviewing reports - Using a shared tracking domain when a branded option is available
- Testing immediately and treating normal DNS propagation as failure
- Checking only the platform’s green verification icon instead of a real message
Email DNS setup is the foundation, not the full strategy
Correct authentication gives mailbox providers stronger evidence that a message is genuinely connected to your domain. It also makes spoofing more difficult and gives you visibility into unauthorized use.
It does not guarantee the inbox.
Mailbox providers still consider sender reputation, complaints, list quality, engagement, sending consistency, content, and recipient behavior. Think of DNS authentication as the passport that proves who you are—not a ticket that guarantees entry.
Once every record verifies, you have removed a major source of avoidable deliverability problems. Then you can focus on the part subscribers actually see: sending email they asked for and want to read.
Need a simpler way to create and check campaigns? Try Sendigram for free and manage your email creation, campaigns, automations, and pre-send checks in one place.
Frequently asked questions about email DNS
Can a domain have more than one SPF record?
No. Each domain or subdomain should have one SPF record. If several services send for the same domain, include them in a single valid SPF record.
Do I need both SPF and DKIM?
Using both is strongly recommended. Gmail requires bulk senders to authenticate with both SPF and DKIM. For DMARC to pass, at least one of those methods must pass with an aligned domain.
Does DMARC require both SPF and DKIM to pass?
No. DMARC passes when either SPF or DKIM passes and the authenticated domain aligns with the visible From domain. Having both configured provides more resilience.
Should I start DMARC with p=reject?
Usually not. Start with p=none, collect reports, identify all legitimate senders, and correct failures before moving gradually to quarantine or reject.
How long do email DNS changes take?
Some changes appear within minutes, while others may take several hours because of DNS caching and TTL values. Follow your provider’s guidance and wait before assuming the record is incorrect.
Does using a sending subdomain protect my main domain?
It can help separate email streams and their reputations, but the separation is not absolute. Mailbox providers may still associate the subdomain with the organizational domain.
Does a custom tracking domain improve deliverability?
It can improve brand consistency and avoid dependence on a shared tracking hostname, but it does not guarantee inbox placement. Authentication, reputation, consent, relevance, and list quality remain essential.
Technical references:




 Your Privacy Choices
