Adding & editing contacts
Managing your contacts is a core part of your email marketing efforts. This guide will show you how to easily add, update, and remove contacts in your Sendigram account.
How to Create a New Contact
You can add new contacts to your Sendigram account in two ways: by importing them from a file or by adding them manually.
To import contacts from a CSV file:
Step 1: Upload Your File
- Navigate to the Contacts section and select Import.
- Drag and drop your file into the upload zone or click to browse your computer.
- Supported Formats: .CSV or .TXT
- Max File Size: 100 MB
- Note: You can upload one file at a time.
Step 2: Organize Your Contacts
Before finishing the upload, you can organize these new contacts:
- Add to Group: Choose one or more existing groups, or create a new one on the fly.
- Add Tags: Assign tags to these contacts to make segmentation easier later.
Step 3: Map Your Fields
Once the file is uploaded, you need to match the columns in your file to the fields in Sendigram.
- Matching: Our system will show you the first few rows of your data. Use the dropdown menus above each column to select the matching field (e.g., Email, First Name, City).
- Ignore Data: If you don't want to import a specific column, select "Ignore field" from the dropdown.
- Create New Fields: If you have data that doesn't fit our standard fields, click "+ Add new field" to create a custom one instantly.
Pro Tip: If you see a red "Unknown" label, it means the data in that column doesn't match the field type (e.g., trying to put a city name into a "Date of Birth" field). Double-check these to ensure your data remains clean.
Step 4: Manage Duplicates
Decide how Sendigram should handle email addresses that are already in your database:
- Replace existing contacts: Updates your current contacts with the new information from your file.
- Skip duplicates: Keeps your existing contact data exactly as it is and ignores the duplicate entry in your file.
Step 5: Finalize Import
Click Add Contacts. You will see a progress bar while we process your list. You can stay on the page or navigate away—we’ll update the contact count in real-time and notify you once the import is successful.
To add a single contact manually:
- Navigate to the "Contacts" section and choose "All contacts".
- Click on the "Add contacts" button in the upper right corner and select "Add single contact".
- Fill in the contact's information, such as their email address, name, and any other relevant details.
- Click "Add contact" to add the new contact to your list.
How to Edit a Contact
You can easily update the information for any of your contacts at any time.
- Find the contact you want to edit. You can use the search bar to quickly locate it.
- Click on the contact's name or email address to open their profile.
- Click the Edit button in the "Contact details" section.

- Now you can edit any of the fields, such as their name, email address, or any custom fields you have set up.
- Once you've made your changes, click "Save" to update the contact's information.
How to Delete a Contact
You can remove a single contact or multiple contacts at once.
To delete a single contact:
- Find the contact you want to delete and click on the contact's name or email address to open their profile.
- Click the "Actions" button in the upper right corner.
- Select "Delete" from the dropdown menu.
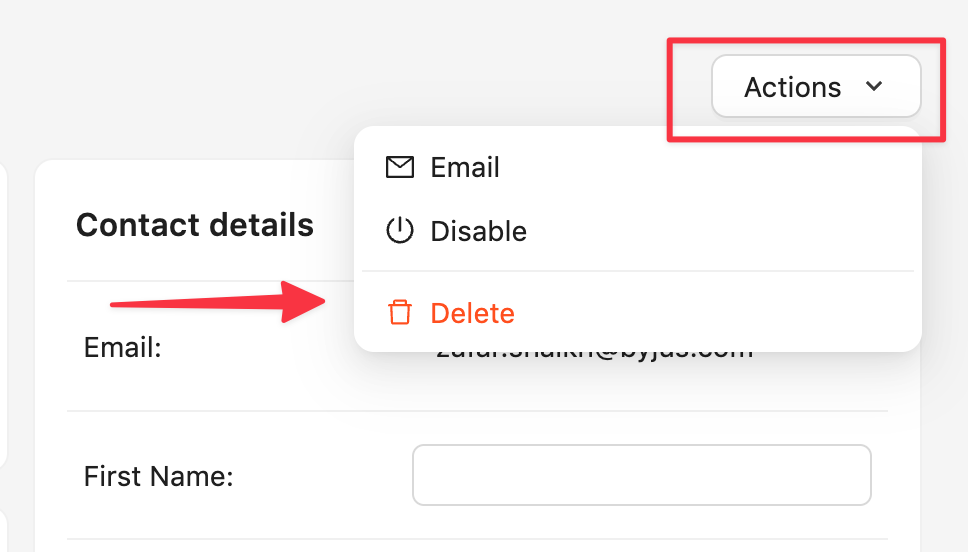
- A confirmation dialog will appear. Click "Delete" again to permanently remove the contact.
To delete multiple contacts:
- In the "All contacts" section, use the checkboxes to the left of each contact's name to select the contacts you want to delete.
- Once you've selected the contacts, a "Delete" button will appear at the bottom of the screen.
- Click on the "Delete" button.
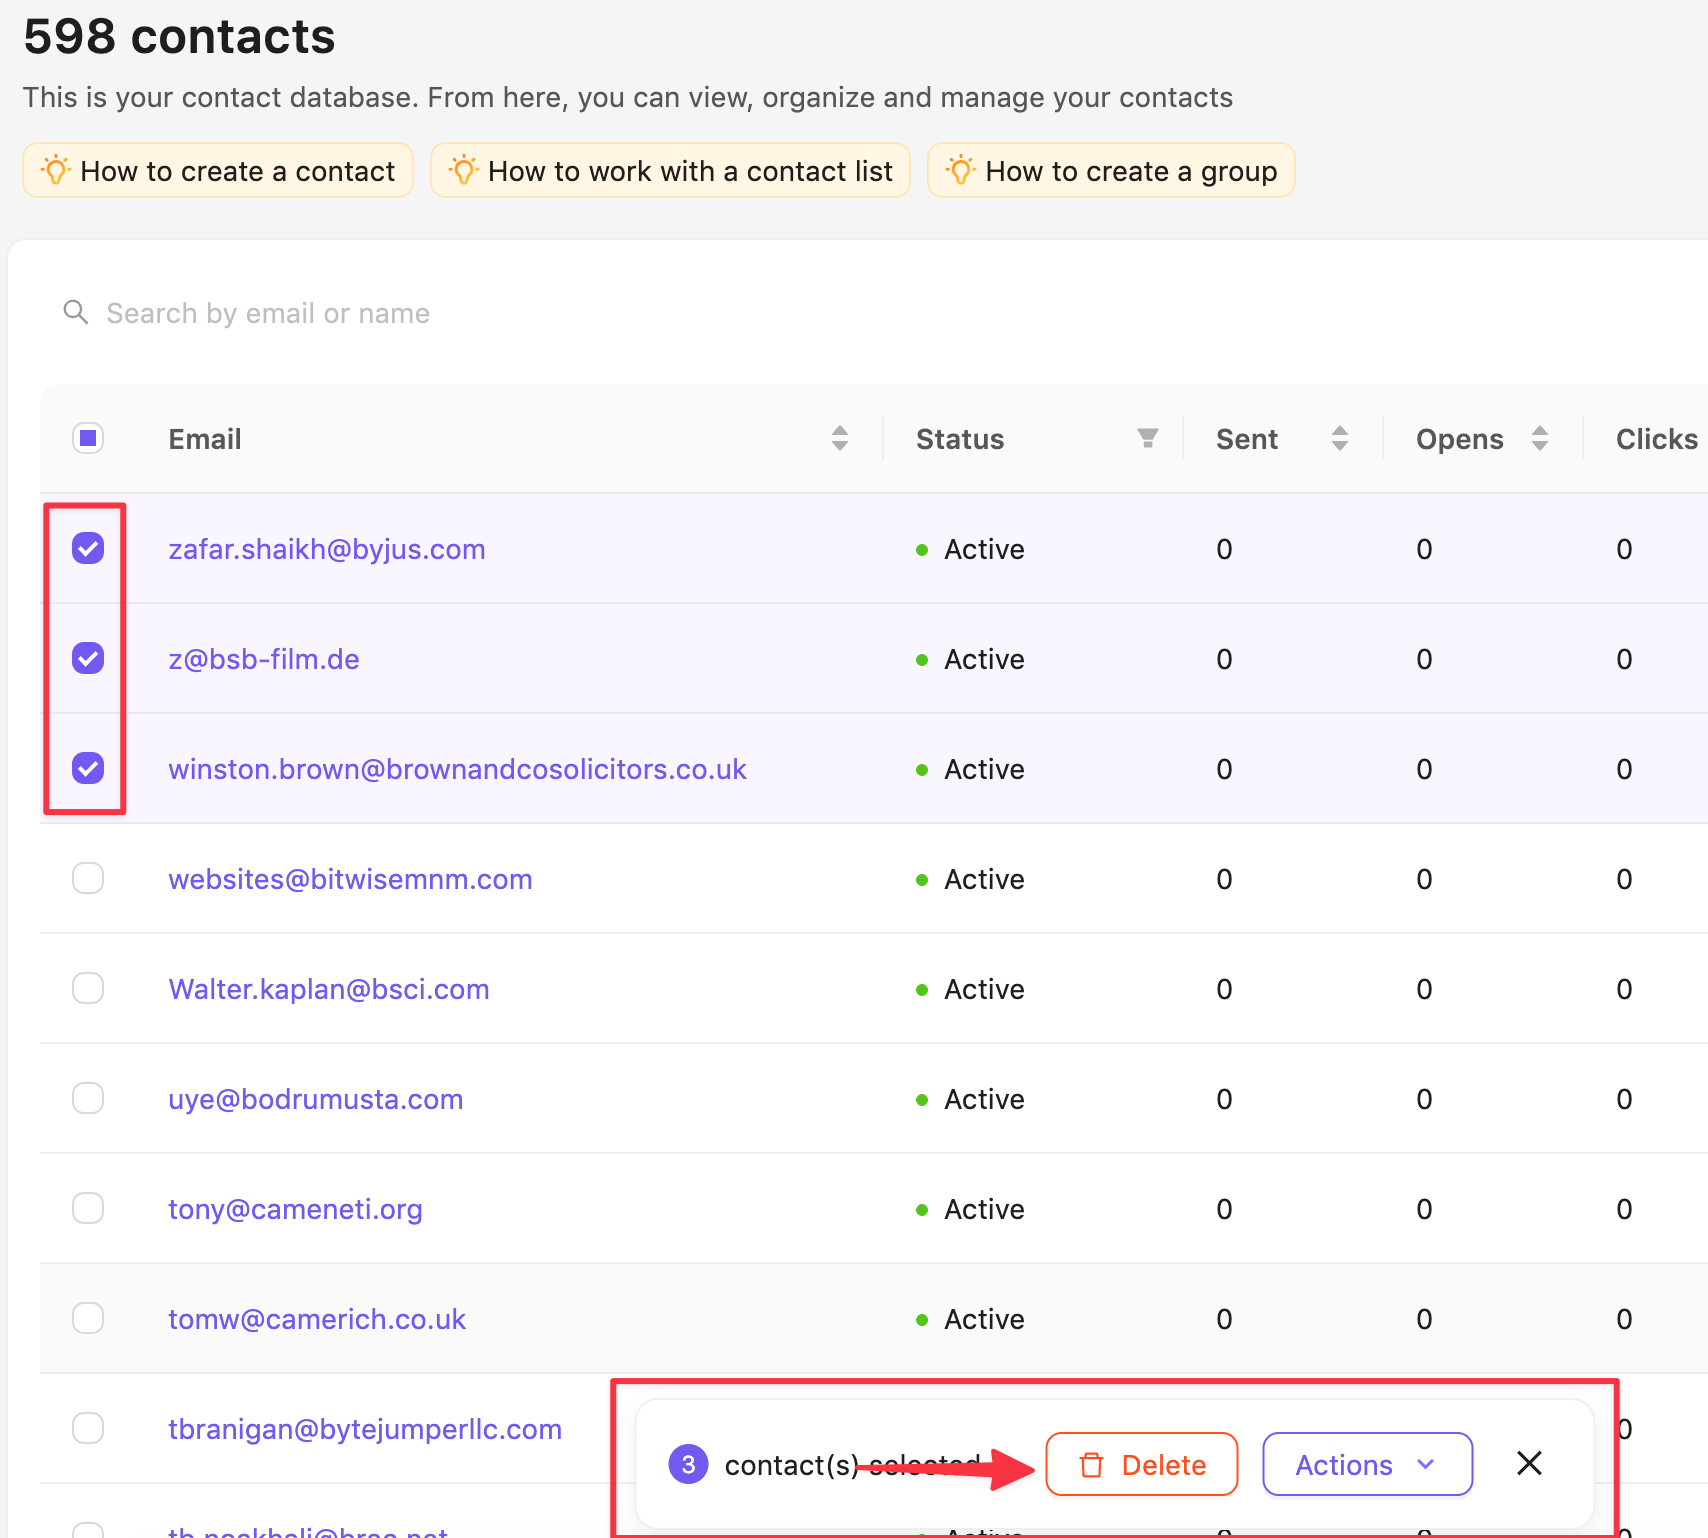
- Confirm your choice in the dialog box to permanently remove the selected contacts.
FYI: If you delete a contact that's currently used in one of your campaigns, it will remain in that campaign unchanged. To completely remove the contact, you must go to the campaign where it's being used and delete it manually from there.