Managing contact groups
Groups help you organize multiple contact lists under one category. They make it easy to manage large audiences, launch campaigns for related lists, and segment your marketing efforts without duplicating contacts.
1. What Are Contact Groups?
- A group is a container that combines several contact lists.
- Unlike lists, groups don’t hold contacts directly — they reference lists that contain them.
- Example: You can create a group called Europe Customers that includes the UK List, Germany List, and France List.
2. Creating a New Group
There are two ways to create a new group.
1. From Groups page.
- Go to Contacts → Groups.
- Click Create group.
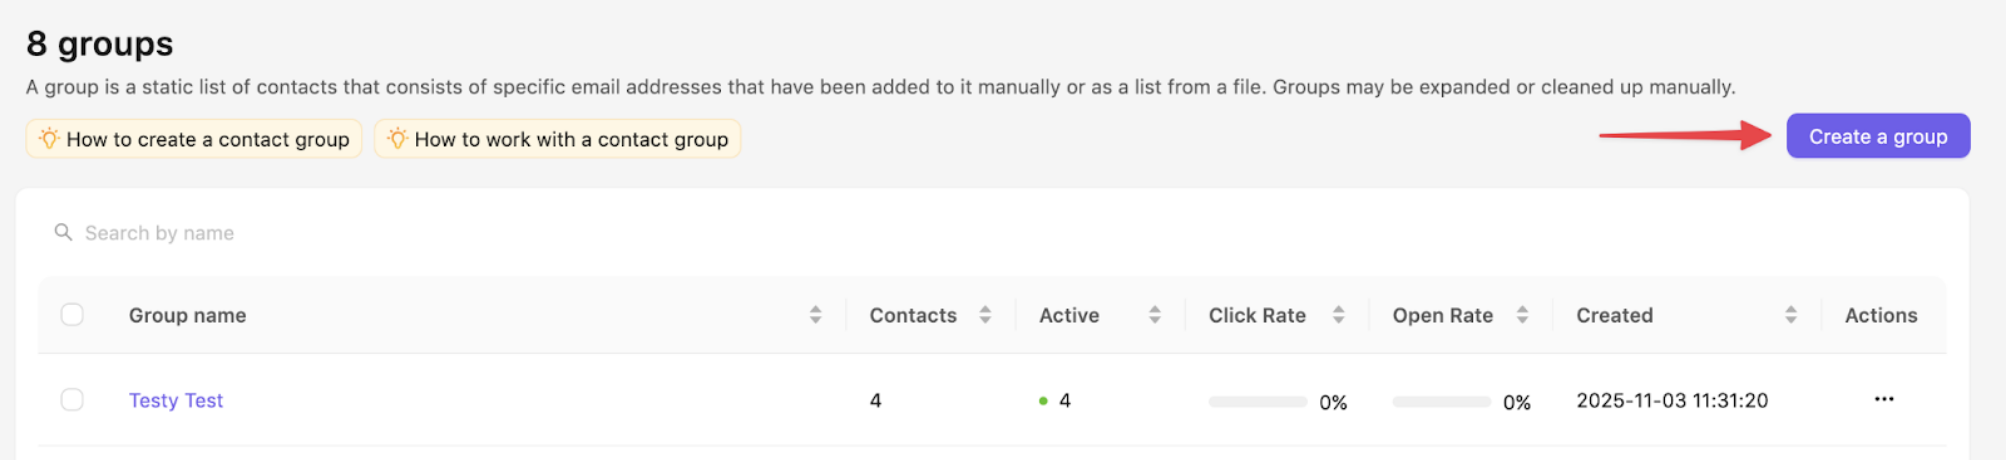
- Enter a Group Name and, optionally, a description (e.g., “Q4 Customers” or “Newsletter Subscribers”).
- Save your changes.
2. From All contacts page.
- Go to All contacts page.
- Select the contacts you want to add to the group you are creating.
- Click Actions button and select Create group with these contacts.
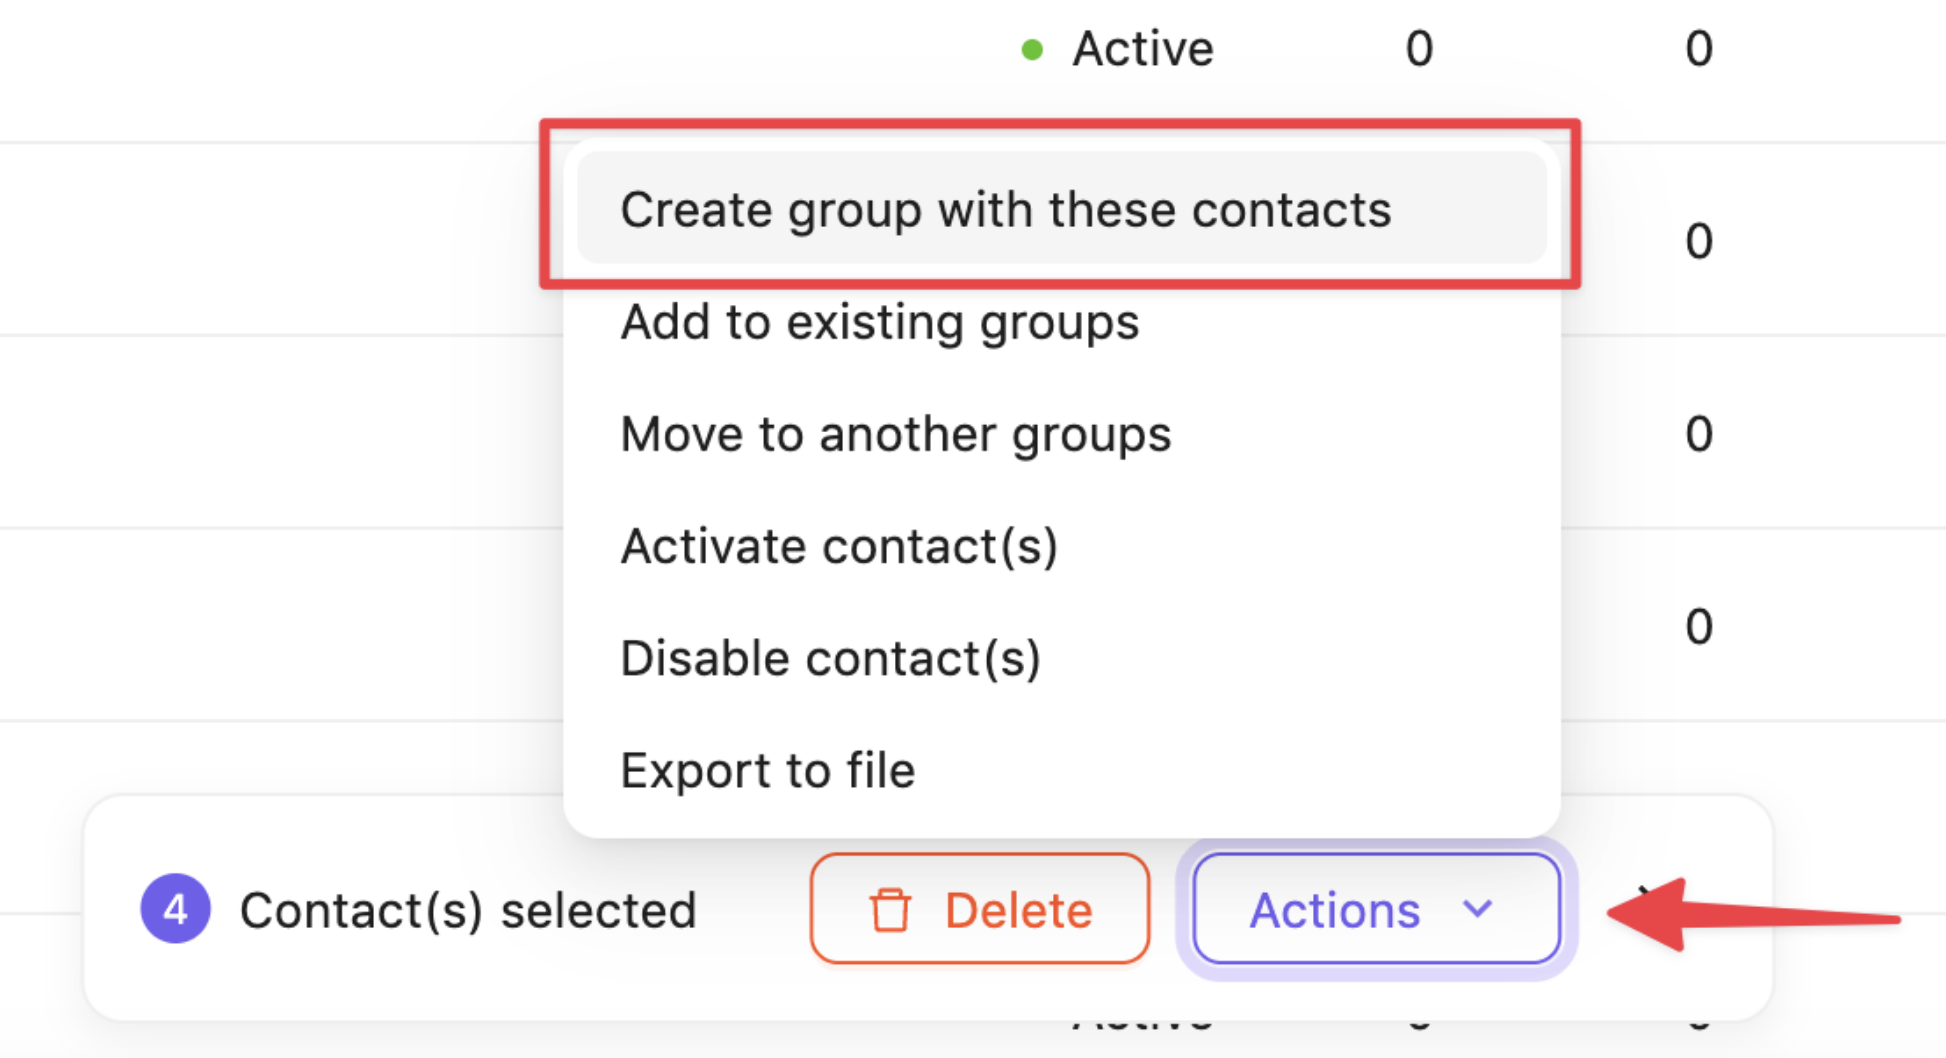
- Enter a Group Name and, optionally, a description (e.g., “Q4 Customers” or “Newsletter Subscribers”).
- Save your changes.
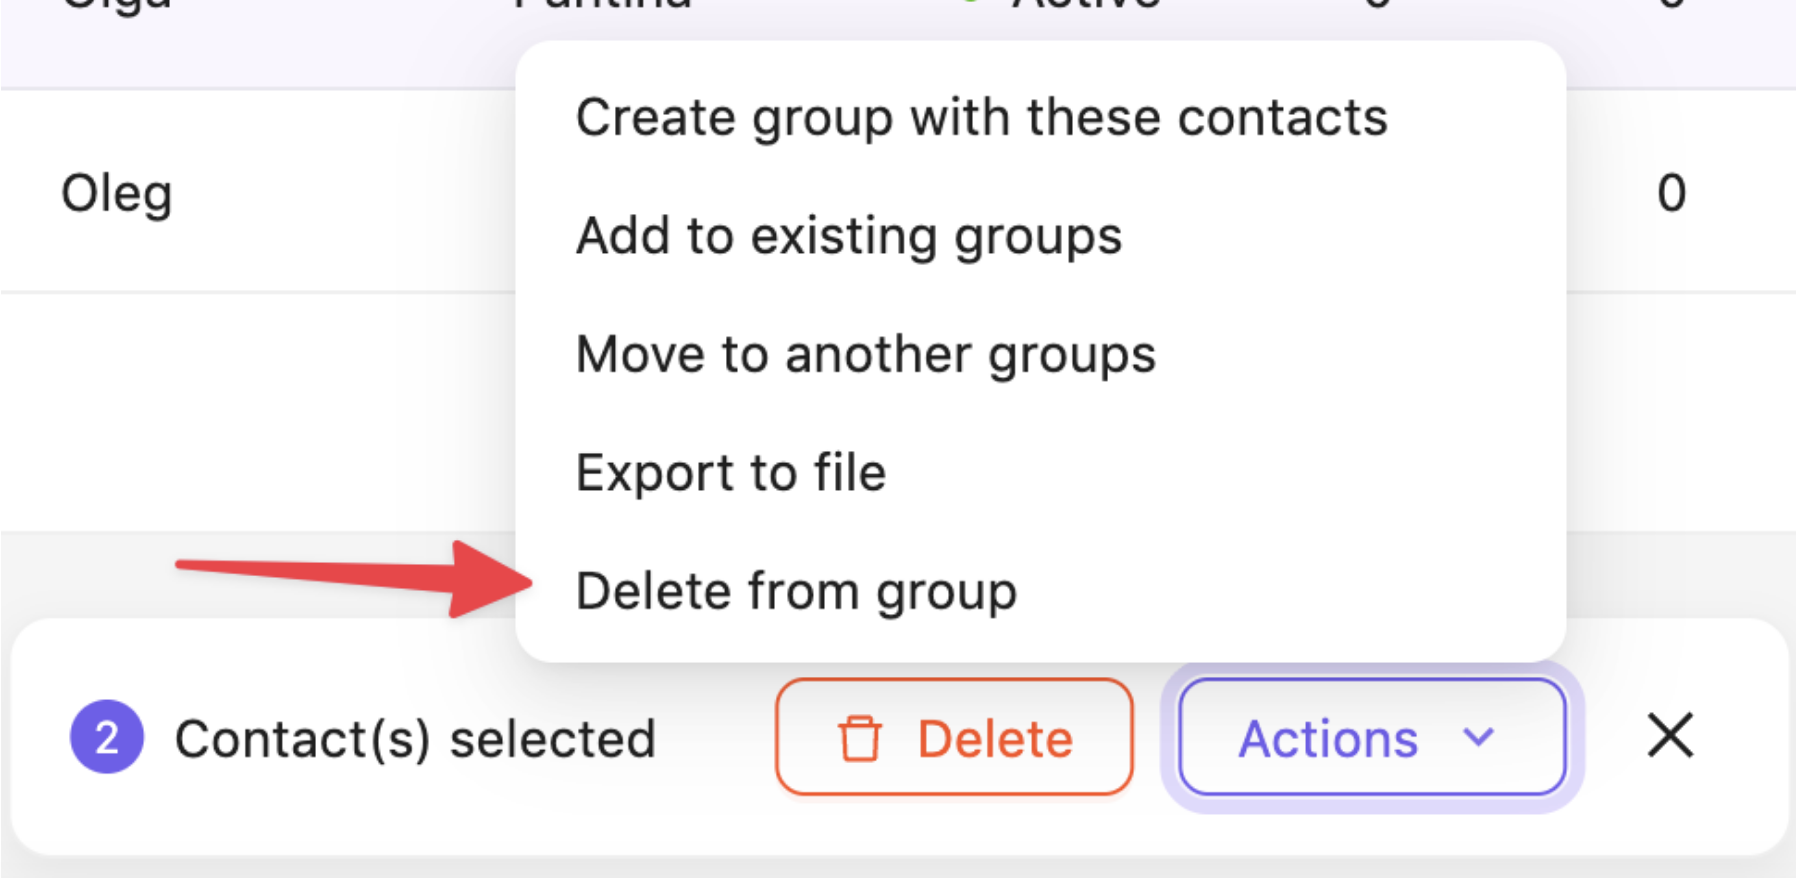
3. Editing or deleting a group
- Open the Groups tab and click the title of the group you want to edit.
- Click Actions in the top right corner of the group window to access Rename and Delete buttons.
- To remove contacts from the group select these contacts and click Actions button at the bottom of the screen. There you’ll see the option to delete the contacts from the group.
Still have questions?